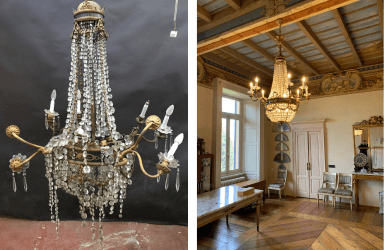
Chandeliers, especially antique ones, are timeless gems that add charm and character to home interiors. But how do you restore a chandelier and bring it back to its original splendor? Over time, these captivating objects may need restoration to preserve their beauty. Continue reading to discover the fundamental steps to restore an antique chandelier, along with practical advice and useful tips.
When and how to restore a chandelier
The restoration of an antique chandelier may become necessary when you observe broken or deteriorated elements. Therefore, it is crucial, as a preliminary action, to carefully assess the condition of the artifact to understand the extent of the damage. Then, you can proceed to disassemble the chandelier, clean its parts, and, if necessary, repaint or replace pieces damaged by time. The procedure unfolds in several phases; let’s see how to restore a chandelier step by step.
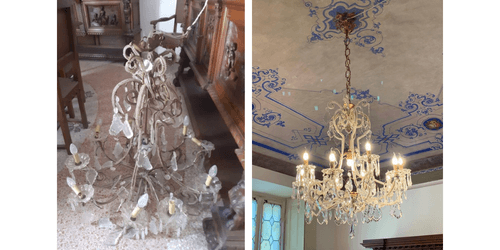
Phases to Restore a Chandelier
To understand how to restore a chandelier, first, you need to know:
- what material the chandelier is made of (often iron, bronze, brass, or occasionally wood).
- the type of intervention you want to carry out (e.g., whether you want to restore only the electrical system while preserving the original patina or bring it completely back to life).
After analyzing these fundamental points, let’s explore the detailed phases that lead to the optimal restoration of a chandelier.
Main tools and materials needed to restore an antique chandelier
To restore an antique chandelier, depending on the model you have, you need some essential tools and materials, such as:
- Paint stripper, to easily remove the original paint, or a sandblasting tool.
- Cap clamps, that are necessary to shield exposed electrical parts.
- Rust inhibitor, to treat rusted parts.
- Sandpaper, to facilitate paint stripping.
- Metal paint, to repaint metal parts when preserving the original color is not possible.
- Tweezers.
- Wire cutters.
- Brass pins and rings for crystal chandeliers.
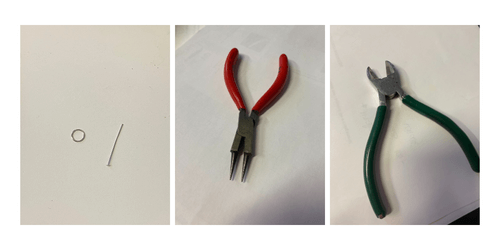
Additionally, it’s helpful to have a basin of water, a sponge, brushes, and sheets of newspaper or cardboard to place the chandelier on for repainting. After gathering all the necessary items, let’s look at the detailed steps to restore a chandelier, always keeping in mind the recommendation to consult professionals in the field.
Preliminary damage assessment and initial cleaning
The first phase involves evaluating and replacing elements such as cups, arms, leaves, or decorations that may have deteriorated over time. If necessary, restoration experts can faithfully replicate many of these pieces, ensuring that the chandelier maintains its authenticity, or they can find vintage replacement parts.
Cleaning is also a crucial phase of restoration. Place the chandelier on a surface covered with old newspapers, cardboard, or blankets and start cleaning it thoroughly with a damp, soft cloth to remove surface dust and dirt.
Disassembly
Once the actual state of the chandelier is established, you can proceed with disassembly:
- for a droplet chandelier, start by removing each glass droplet and crystal decoration individually.
- for a classic arm chandelier, simply disassemble the arms one by one.
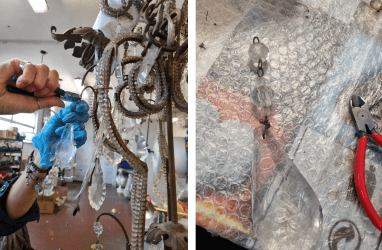
In any case, unscrew the light bulbs, and don’t forget to take notes on how to correctly assemble all components in the right order.
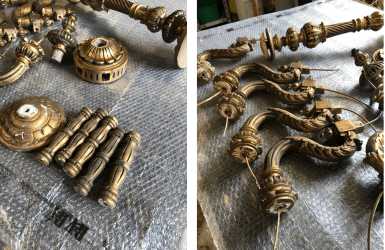
It’s also crucial to protect the electrical parts and ensure their proper functioning by shielding them with clamps.
Deep cleaning
Treat the parts with a degreaser and, if necessary, use fine sandpaper to remove the original paint. This will prepare your chandelier for the next painting and/or polishing treatments. Don’t forget to remove the dust generated during sanding.
If the chandelier contains ferrous parts, especially if they have rust, it is highly advisable to apply a rust inhibitor before painting and let it absorb for the necessary time to complete its action.
Painting or polishing
Depending on your needs, you can choose painting, polishing, or both:
- painting: it is advisable to individually paint each disassembled component with thin layers of spray paint or applied with a white bristle brush.
- polishing: use a specific product and spread it with a cotton cloth.
Electrical system redo
Once all the components are cleaned, damaged parts replaced, and the paint is dry, you need to redo the electrical system to avoid potential issues. If necessary, replace lamp holders and old wires inside the components with their new, compliant versions.
At this point, reassemble all the chandelier components and then mount it again (or for the first time) on the ceiling.
How to mount a chandelier? Find out here
The importance of trusting professionals
By carefully following the various restoration phases, you can bring these fascinating objects back to life, preserving their charm and beauty. However, to achieve optimal results, it’s always advisable to rely on professionals capable of completing the assembly with the utmost precision.
The restoration of an antique chandelier is indeed a delicate art that requires extreme care and specific expertise. Entrusting professionals ensure accurate intervention that respects the authenticity of the artefact. Restoration masters not only assess the object’s condition with an expert eye and skillfully repair damages but can also precisely replicate missing pieces, preserving the chandelier’s integrity. Professional management of disassembly and meticulous cleaning is crucial to maintain the safety and aesthetics of the piece.
In summary, trusting professionals is the ideal investment to restore an old chandelier to its ancient beauty without compromising its authenticity. For over sixty years, we have been producing and restoring quality chandeliers to guarantee astonishing results. Contact us for a free inspection or send us photos to receive a quote.
